Product Applications

Kits are available to be attached to the vehicles. The Kit includes: LED lights, wiring, control module and simple to install instructions.
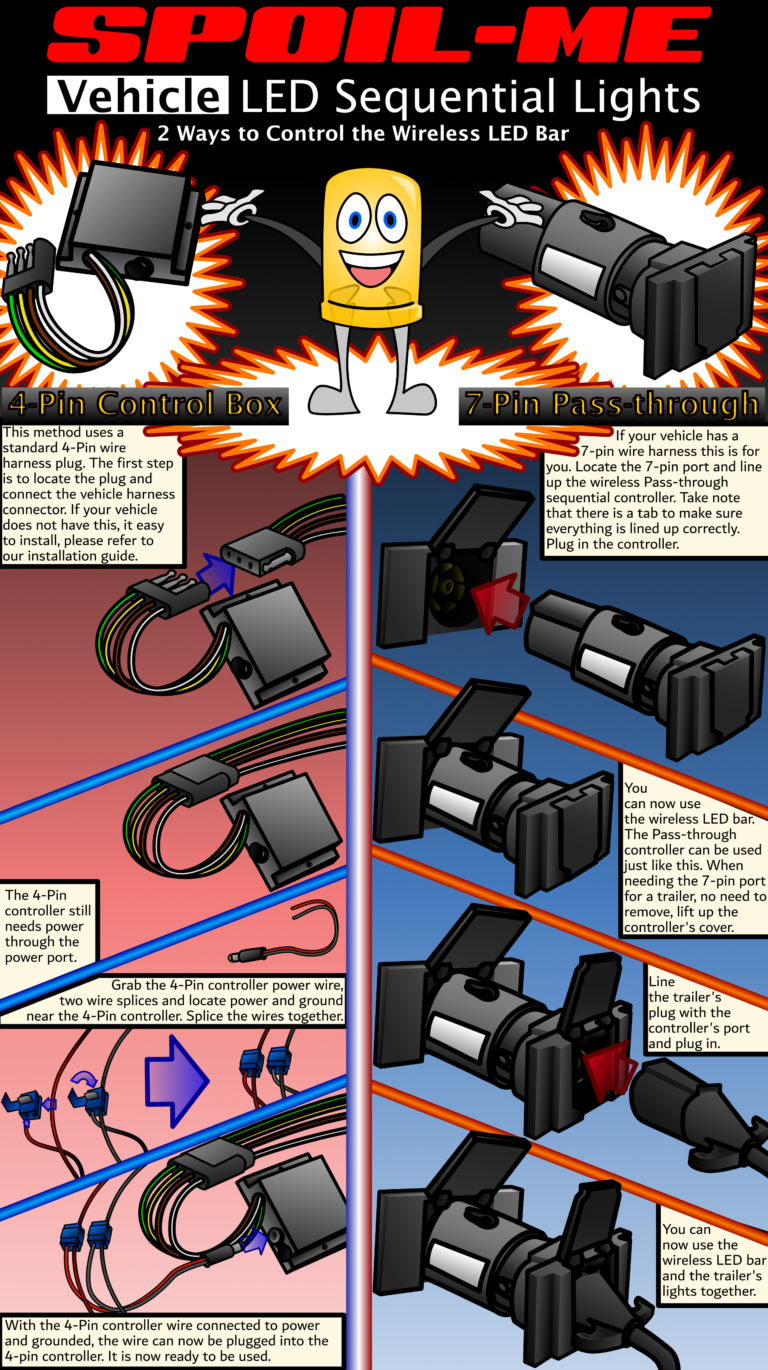
Kit operation: wire leads connect simply to the vehicle light wires that are provided. No more than four required wire connections. The connectors from the kit leads strap around the vehicle light circuit wires, no cutting required.


Strip Installation Instructions
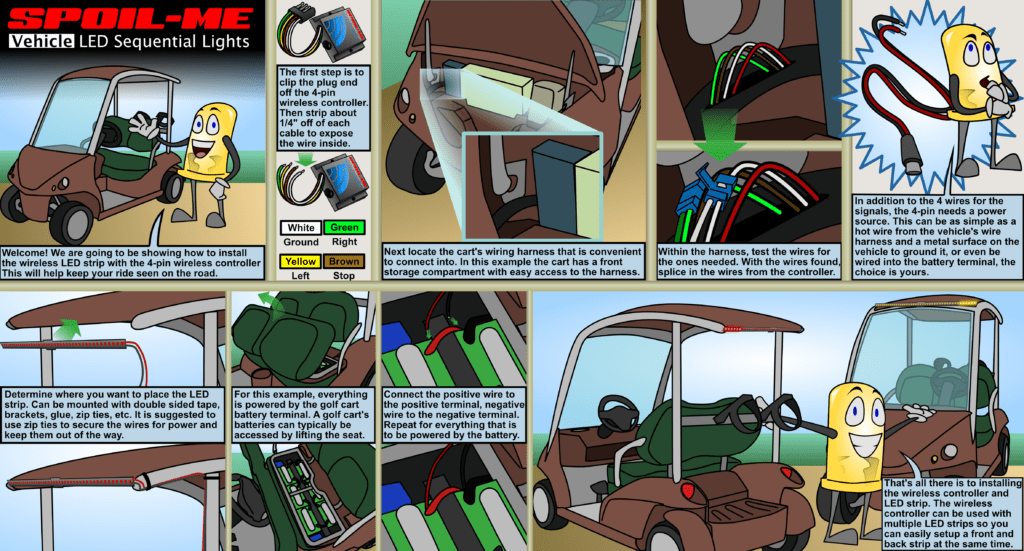
First Look in the Rear of your Vehicle and See if you have a (TRAILER PLUG) ? if YES Then just plug the (SPME) plug into it. If you don’t have a PLUG then go to the back of your Vehicle and open the (TRUNK,HATCH.etc) and Look for (HARNESS) It’s on the LEFT in most Vehicle’s,Then you remove the carpet or plastic cover, you will find bunch of wire’s taped together that’s your (HARNESS)
Now take your 12 Volt. light tester. (MAKE SURE YOUR TESTER HAS A GOOD GROUND) and put your LEFT turn signal ON and Start to stick the Tester in the Wires One by ONE ..When the tester Light’s Up That’s the wire you slide in to the (QUICK SPLICES) Clip Then go to the next wire and so on.When all wire’s are connected.Then plug to (SPME) “controller” and plug the HDMI cable to the light strip..(Then Test the connection) When Installing the SPME strip to your Vehicle’s inside Back window. Put the HDMI cable in to you HDMI tool . with cable in place,guide tool along Top edge of backseat and trunk push the HDMI cable Tool between edge as much as possible through on to the trunk. Then go to your trunk and pull the tool the rest of the way through. Connect the HDMI cable to the Control Box.
(TEST THE STRIP AND CONTROLLER)
Then take the Two SideTape and applied to the light strip For the back Window cut 1″ x 3 strips for Left. Center Right then find a SURE SPOT you want to Install. Then stick it to your Vehicle.. (Tape be hard to Remove Once is Applied)
Spoil-Me LED Strip lights offer majestic cosmetic appearance and beauty and added function and Safety to the vehicles.


